Inserting new profiles by selecting points
You can insert new cross sections by selecting the points that make up the profile from the current point file.
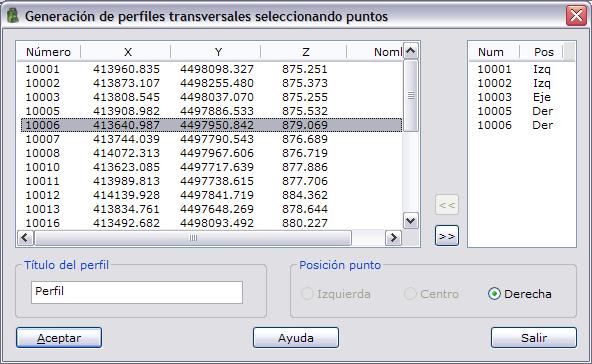
The program displays a dialog box with the list of all the points that can be included in the profile.
To include a new point in the profile, select it from the list and click the >> button, or double-click it with the left mouse button. Before including it, indicate whether the point lies to the left of the cross-section axis, to its right, or on the axis. To do so, choose the option in the Point position field.
The program lets you keep entering points to the left of the axis until you designate a point that acts as the axis. From then on, points can only be included to the right of the axis.
You can also remove a point from the list of selected points by clicking the << button, or by double-clicking it with the left mouse button in this list.
The program allows points to be repeated in the profile setup.
Before accepting the data, assign a name to the profile in the Profile title field.