Auto levels
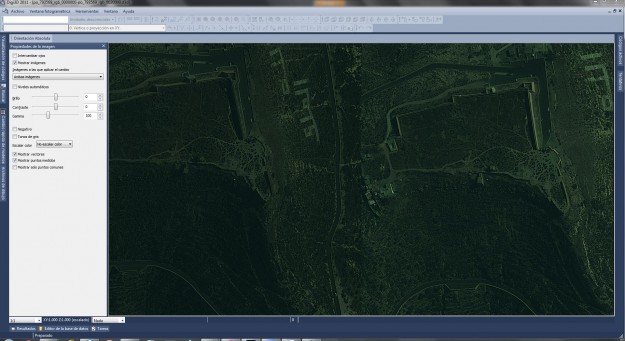
The following screenshot shows a satellite image radiometrically very poor, as it is very dark and also has little contrast:
 If we analyze the histogram of the image (screenshot obtained from Photoshop Elements)...
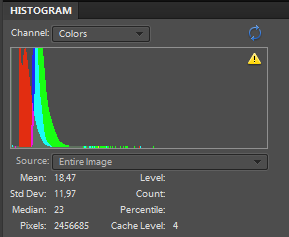 ...we can graphically verify the two previous statements:
- The image is very dark because most of the pixels are on the left of the graph, which is where the dark colors are.
- The image has very little contrast because most of the pixels are clustered.
We might think that we can improve the image by changing the brightness, contrast and gamma), but we would not get an optimal image, because the solution is not to move the histogram or expand it equally, but to equalize it. For this, we have the Auto Levels tool of the Properties of the image pane that you can make appear in the photogrammetric window/Properties of the image menu.
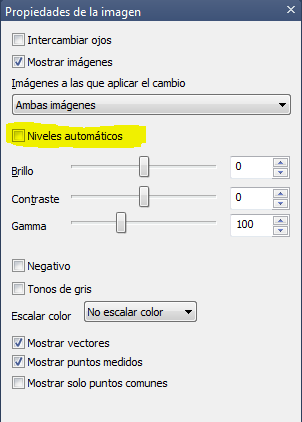 If we activate this box the program will improve the levels (brightness/contrast) of the image automatically as you can see in the following screenshot:
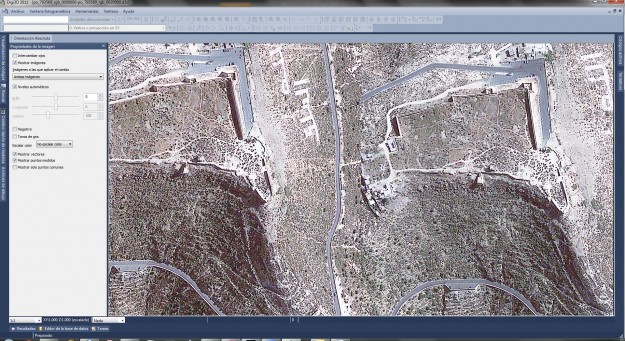 It is virtually impossible to photo-interpret anything in the image that heads this blog post, however in this last capture you can photo-interpret any accident without any problem.
To achieve this operation, Digi3D.NET needs to know the histogram of the image, and to calculate the histogram of the image you have to analyze the 100% of the pixels of this (to know how many pixels have intensity 0, how many have intensity 1, how many 2,... how many 255 for the red, green and blue channels) and how you have to analyze the 100% of the pixels of the image, because logically you have to load the entire image, which means that the first time we activate this box the program will take a while (a progress bar will appear indicating that the histogram is being analyzed).
When you finish analyzing the histogram, a file will be generated in the same directory as the image, with the same name but with the extension .imageProperties, which is a file that stores this information, so that the next time we activate the box for this image, it will not be necessary to load it entirely and therefore the process will be immediate.